Specifications
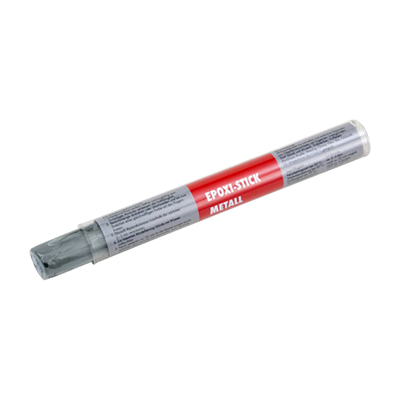
Retouching Putty Metal Epoxy Stick
- 2-component compound for quick and simple repairs of surface damage.
- Easy to use
- Excellent adhesive properties
- Simple to process further
- High temperature resistance up to 120°C, briefly up to 150°C
- No laborious mixing process required
- Good dispensing option
- Quick to applyHigh strength
- Broad range of applications
- Suitable for a wide range of post-processing options, such as drilling, milling, sawing and sanding
- Can be painted over
Notice – Protect from frost and direct sunlight when not applied. Gloves should be worn when applying the repair compound. Due to the different material densities, there are differences in the information regarding the weight of each stick type. For applications subject to high material stresses, the suitability of the repair compound must be checked with preliminary testing.
The usage instructions are recommendations based on the tests we have conducted and our experience; carry out your own tests before each application. Due to the large number of applications and storage and processing conditions, we do not assume any liability for a specific application result. Insofar as our free customer service provides technical information or acts as an advisory service, no responsibility is assumed by this service except where the advice or information given falls within the scope of our specified, contractually agreed service or the advisor was acting deliberately. We guarantee consistent quality of our products. We reserve the right to make technical changes and further develop products.
Application area – For filling surface damage to metal, e.g. gear unit housing, aluminium and die-cast parts etc. Application substrates: Steel (plain and anodised), zinc sheets, cast iron, aluminium, copper, brass, chrome, titanium, lead and stainless steel
Instructions
1. The surface must be clean, free from grease and load-bearing. Roughening the surface beforehand improves adhesiveness
2. Twist off or cut off the required quantity and knead with your fingers until an even colour is achieved
3. Then apply the repair compound within the next 2–3 minutes
4. Dampen your hands with water to improve the modelling process
5. After another approx. 20 minutes, the compound is completely hardened and can be processed further


